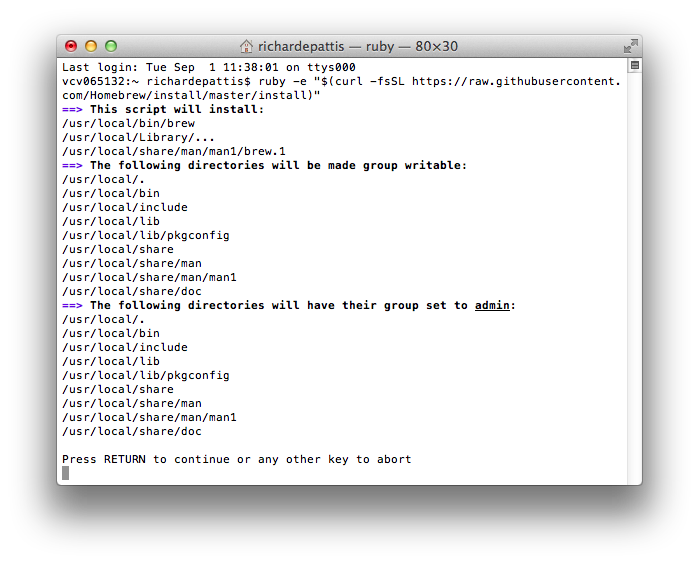
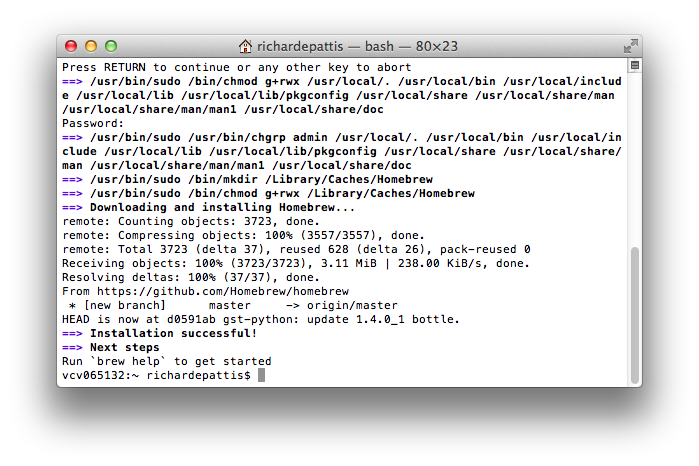
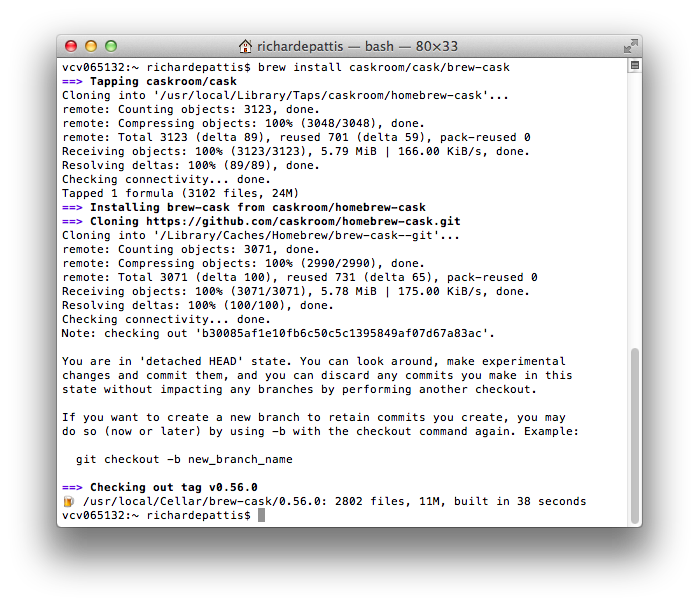
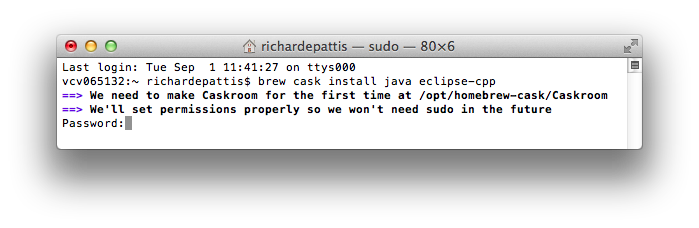
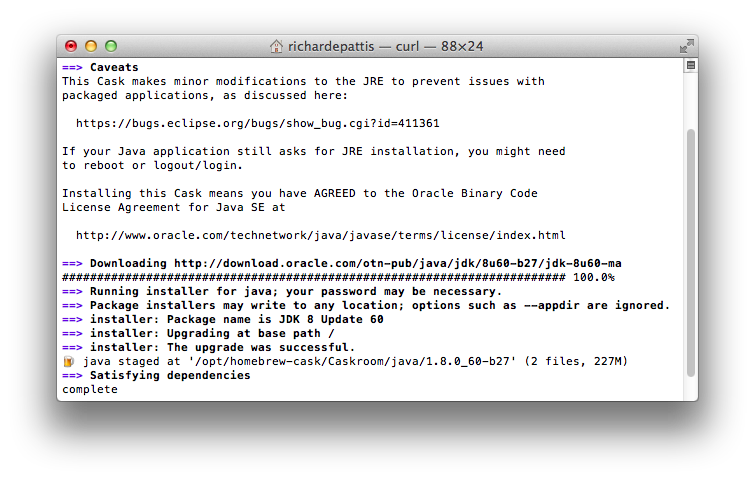
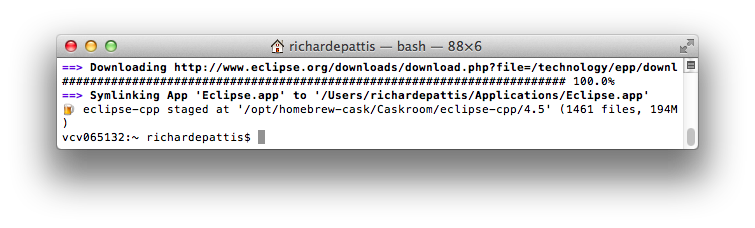
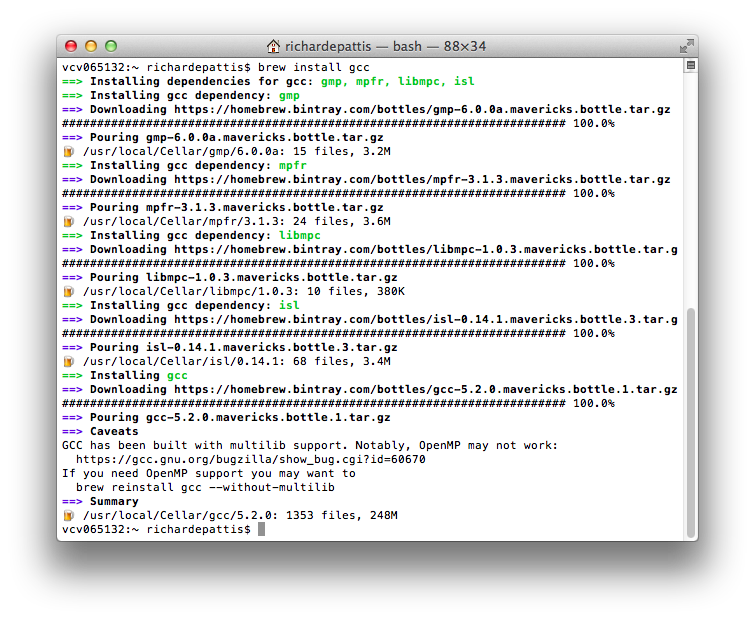
It will perform a series of download, some short, some longer
(taking minutes).
- Double-click the Eclipse icon on the Dock that you just
created above.
The following splash screen will appear

and then a Workspace Launcher pop-up window will appear.
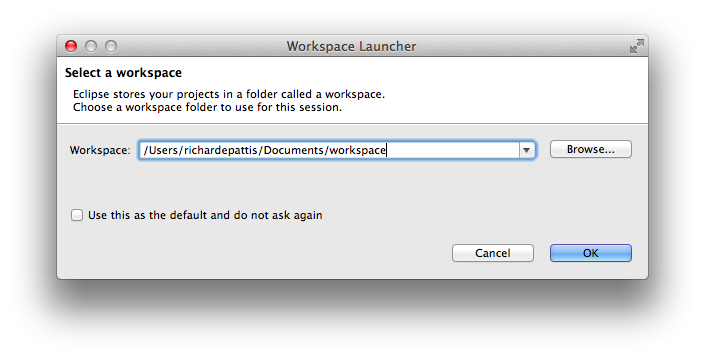
In the Workspace text box, your login name should appear between
/users and /Documents\workspace, instead of my name,
richardepattis.
Leave unchecked the
Use this as the default and do not ask again box.
Although you will use this same workspace for the entire quarter (checking
projects in and out of it), it is best to see this
Workspace Launcher pop-up window each time you start Eclipse, to
remind you where your workspace is located.
- Click OK.
Progress bars will appear at the bottom of the spash screen as Eclipse
loads.
Eventually the Eclipse workbench will appear with a Welcome tab
covering it.
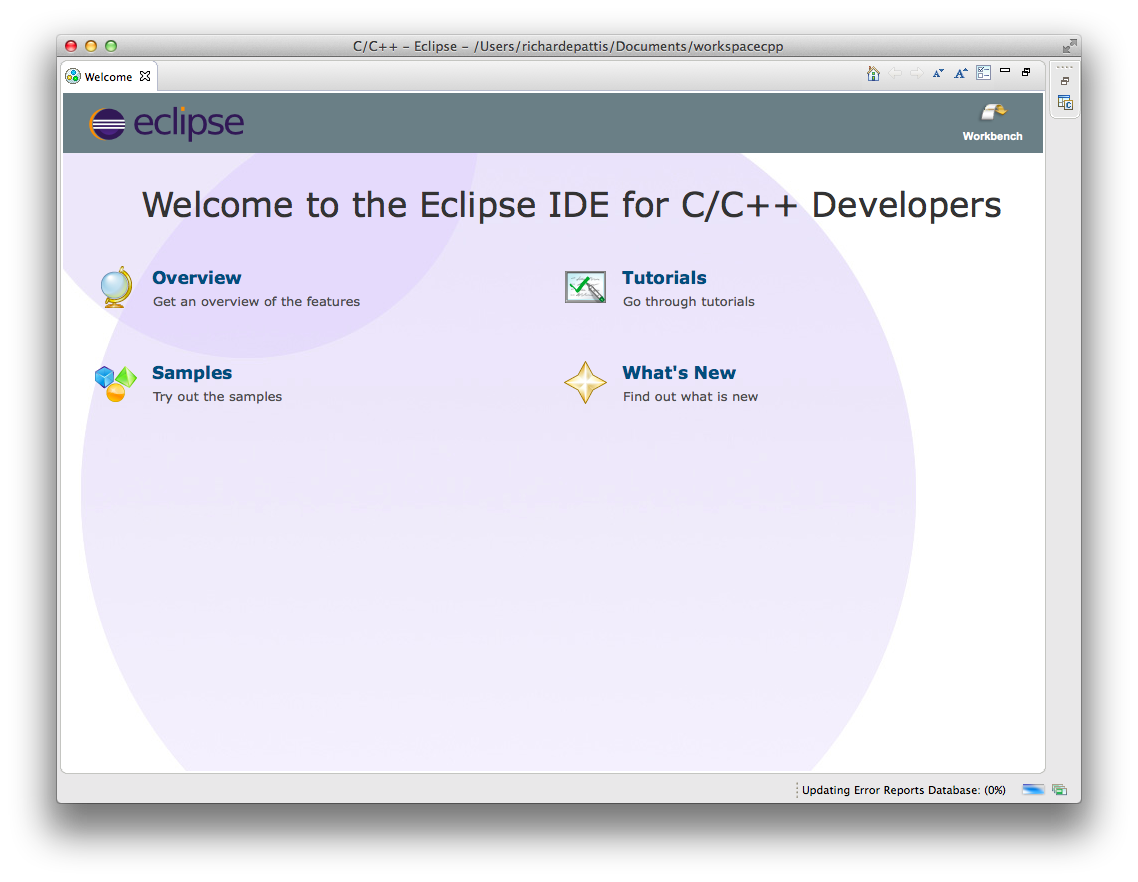
- Terminate (click X on) the Welcome tab.
You will not see the Welcome tab when you start Eclipse after this
first time.
You should now see the following Eclipse workbench.
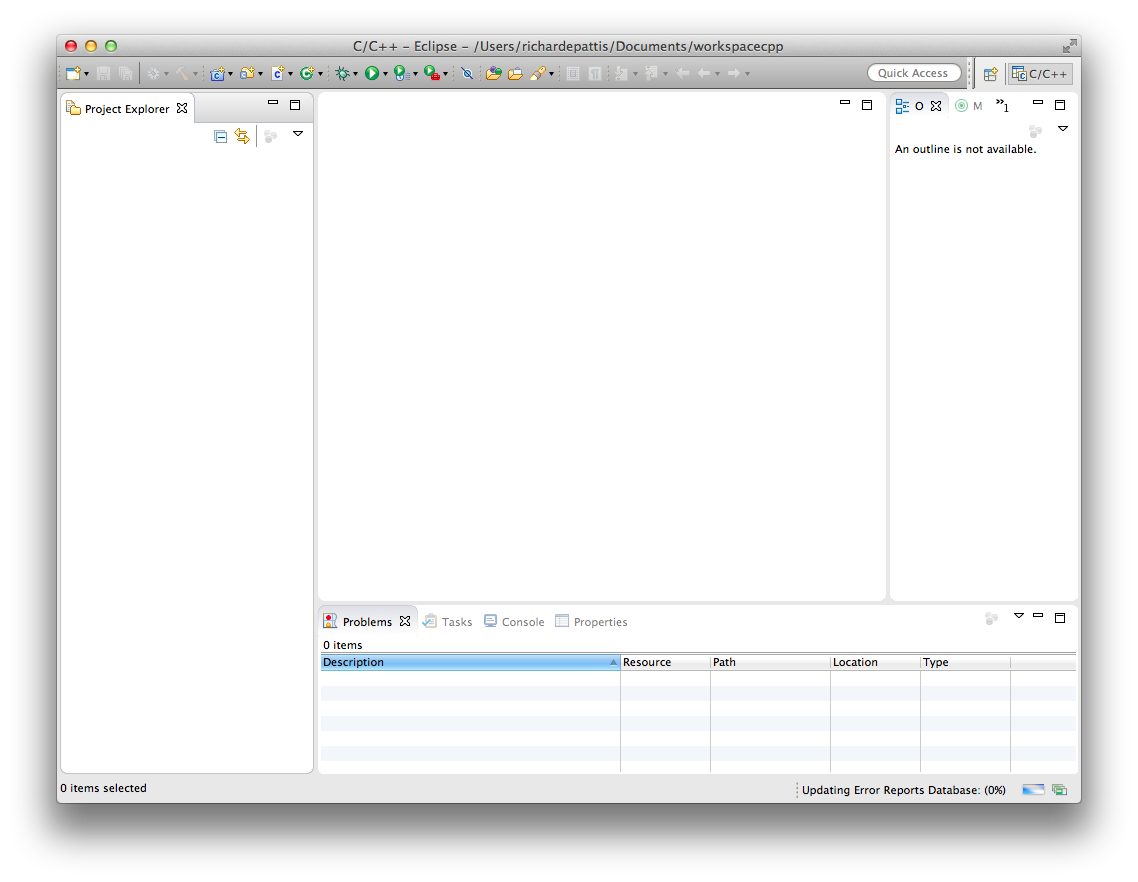
Notice the C/C++ words/icon appear on the top left (in the Window
title-bar) and below the upper right-hand corner (beneath the tool-bar).
- To simplify the edit/build-recompile/run loop that we will discuss below,
perform the following operation: after completing it, clicking
Build or Run will automatically save the contents of any
edited file before the program is rebuilt and run.
- Select Eclipse | Preferences.
- In the Preferences popup window disclose General and
select Workspace.
- Click "Save automatically before build" checkbox, as follows..
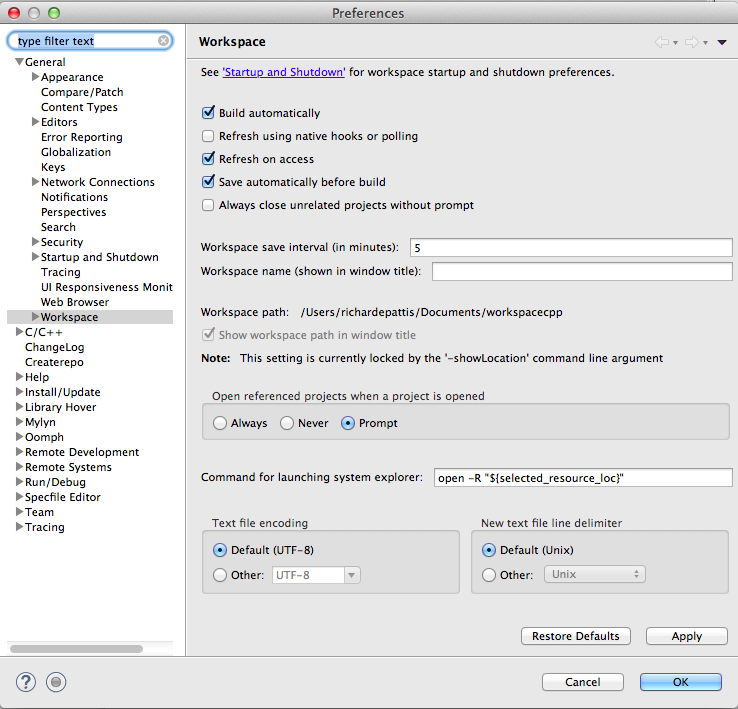
- Click Apply.
- In the Preferences popup window disclose Run/Debug and
select Launching.
- In the "Save required dirty editors before launching" section click
the Always radio button as follows.
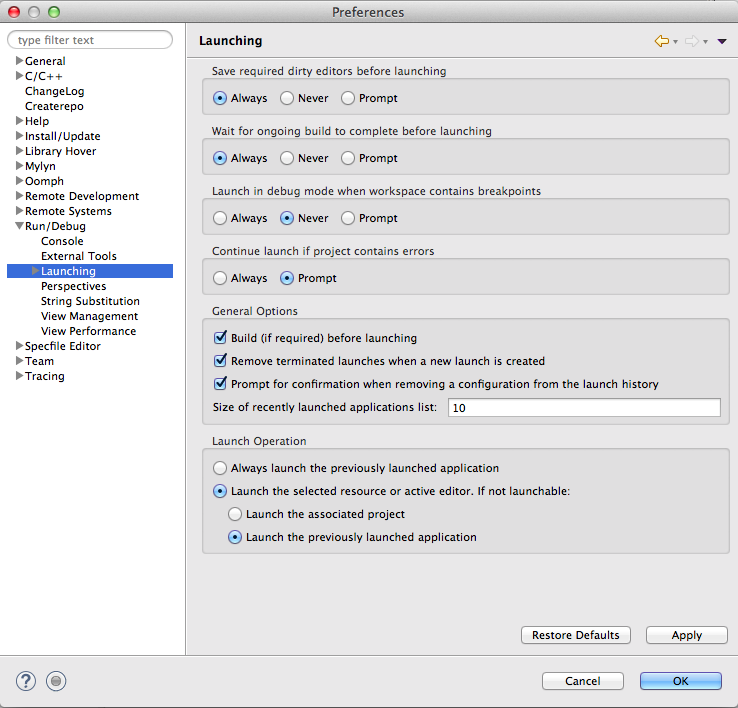
- Click Apply.
- Click OK.
Once you have set up these preference in a workspace on your home machine,
you will never have to peform this step again.
- Download the ics46-templates.zip file
and unzip it.
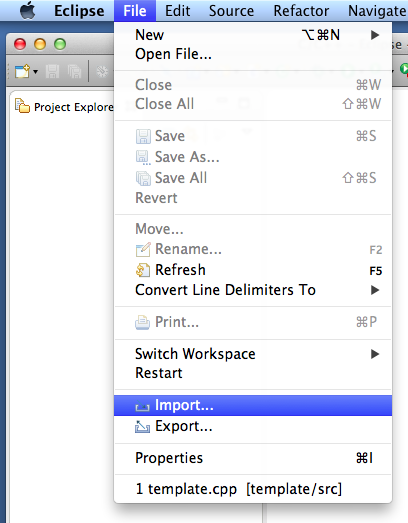
- Select File | Imports as shown below.
- Disclose General and select Existing Projects into Workspace
as shown below.
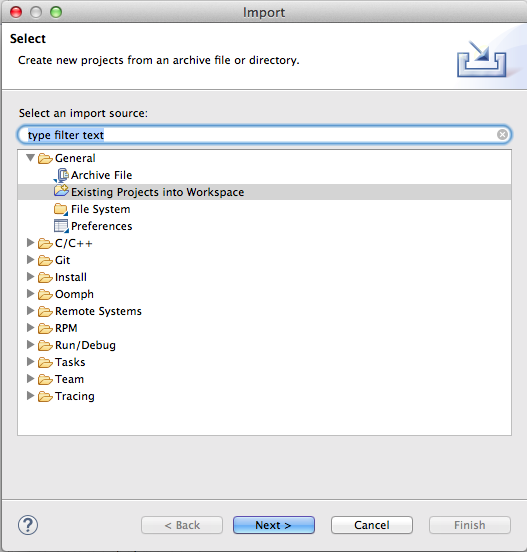
- Click Next>
Browse to the ics46-templates folder you downloaded and unzipped in
above.
Click the "Copy projects into workspace" checkbox, as shown below.

- Click Finish.
The Project Explorer window should be updated to appear as follows.
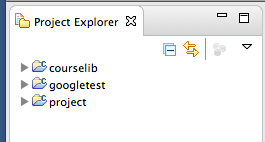
You can explore the courselib and googletestlib projects
by disclosing/eliding their folders and subfolders.
The software in these projects have already been built, so you do
not need to build them here.
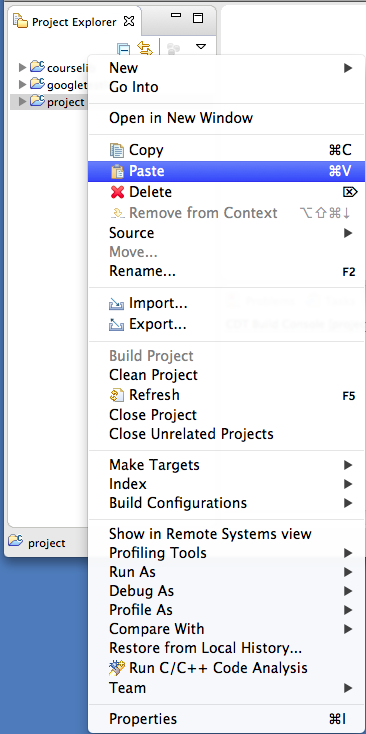
- Right-click the project icon in the Project Explorer tab
and select Copy as shown below (or click project icon and use
the Command+c shortcut for Copy) as shown below.

- Right-click the project icon in the Project Explorer tab
and select Paste as shown below (or use the Command+v shortcut for
Paste) as shown below.
- Rename it to be test_set as shown below
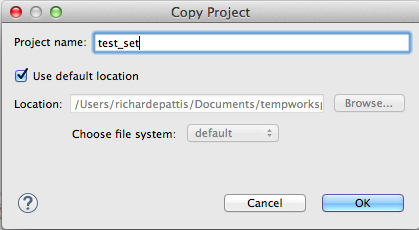
and click OK.
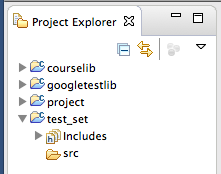
- Disclose the test_set icon in the Project Explorer tab: it
shows an src folder which should appear empty, as shown below
- Download and unzip test_set.zip.
Copy/Paste all the files in its src folder into the src folder
shown in the newly created and disclosed test_set project folder.
Copy any data files (there is one: loadset.txt) into the newly created
test_set project folder.
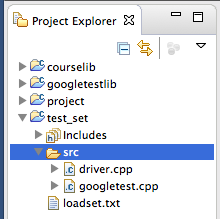
Disclose the src folder, which should appear as shown below
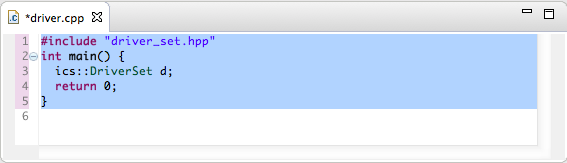
- Double-click the driver.cpp file in the src folder.
In the Editor tab for the driver.cpp file select all the lines (Command+a)
and then uncomment them (Command+/).
The Editor tab for the driver.cpp file should show the following.
Notice the * prefixing the driver.cpp file name: this
indicates the file has been modified but not saved.
You can right-click in the file and select Save, but Eclipse will do
that automatically when you build a project (if you correctly followed the
instructions for installing it).
- Either click the test_set icon in the Project Explorer tab
and then click the Hammer icon
 ; or
right-click the test_set icon in the Project Explorer tab
and select Build Project.
The Console window should show the following.
; or
right-click the test_set icon in the Project Explorer tab
and select Build Project.
The Console window should show the following.
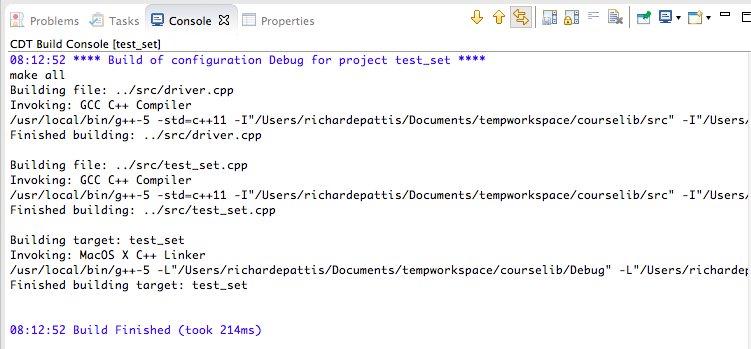
- Either right-click the test_set icon in the Project Explorer
or right-click in the driver.cpp Editor tab.
Then select Run As and 1 Local C/C++ Application.
The Console window should show the following.
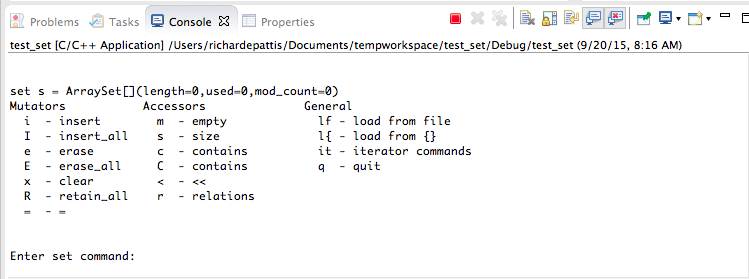
You can use this driver interactively to test various operations on the
Set data type that is implemented by an array
(from courselib).
When you are done testing, the q command quits/terminates this code.
- Comment out all the code in the Editor tab for the driver.cpp
file (Command+a followed by Command+/).
Double-click the test_set.cpp file in the Project Explorer
tab.
Uncomment all the code in the Editor tab for the googletest.cpp
file (Command+a followed by Command+/).
Compile-Build and Run this code: because we are rerunning a project that has
already been compiled-built and run, we can recompile-rebuild and rerun by
just clicking the Run icon ( ).
Knowing this shortcut is useful.
).
Knowing this shortcut is useful.
Ignore the two warning message: this code uses a for-loop counter
that is not used inside the loop.
When prompted, type 1000 and enter, enter, and 1000 and enter
(as shown in green below).
The Console window should show the following.
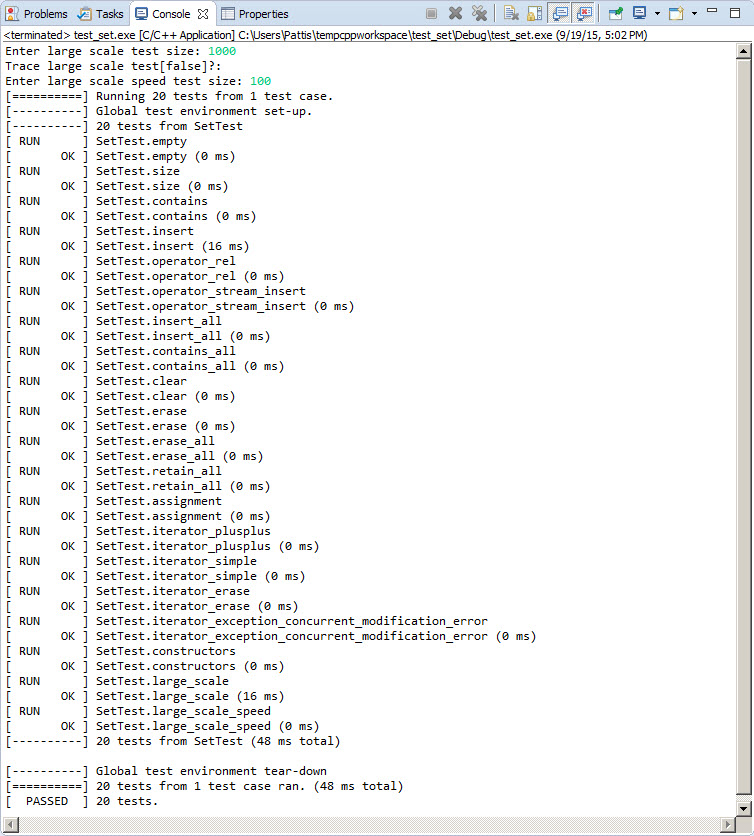
(note: this is actually a picture from my PC)
Eclipse and C++ are now working correctly with the