Course Library Installation and Use for Eclipse/C++
Instructions


These instructions explain how to install the course library folder (courselib) in Eclipse/C++. Then they explain how to create a project that uses the library. At various times during the quarter you may be asked to replace various .hpp or .cpp files and recompile the library.


Courselib Installation

  1. Download and unzip the courselib.zip file; the result is a courselib folder.

  2. Locate the workspace folder (typically /Users/yourname/Documents/workspace) and put the courselib folder you downloaded and unzipped into this workspace folder. The courselib folder contains course-specific C++ .hpp and .cpp files that are usable in all C++ projects in Eclipse.

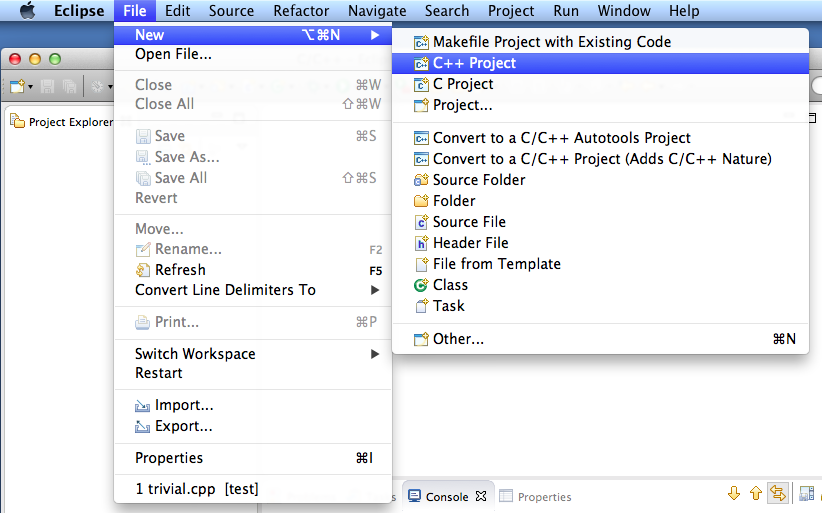
  3. Select File | New | C++ Project as follow.

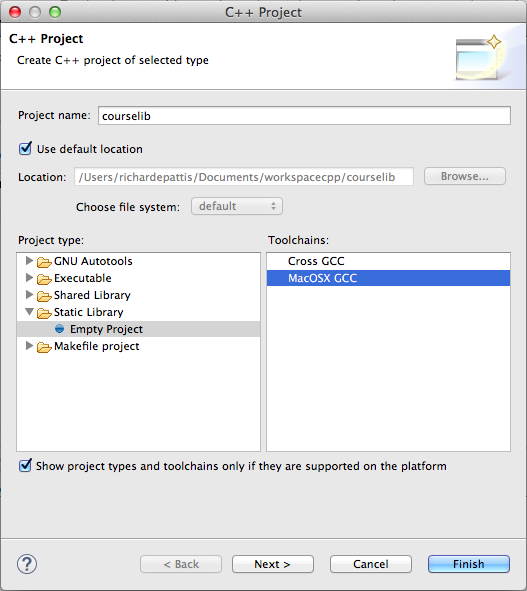
  4. Create a new C++Static Library project in the C++ Project popup window.

  5. Right-click the courselib icon in the Project Explorer tab.

  6. Select Properties which appears as the bottom as follows.

  7. In the Properties for courselib popup window

  8. Either click the Hammer icon or right-click the courselib icon in the Project Explorer tab and select Build Project. The Console window should show the following.
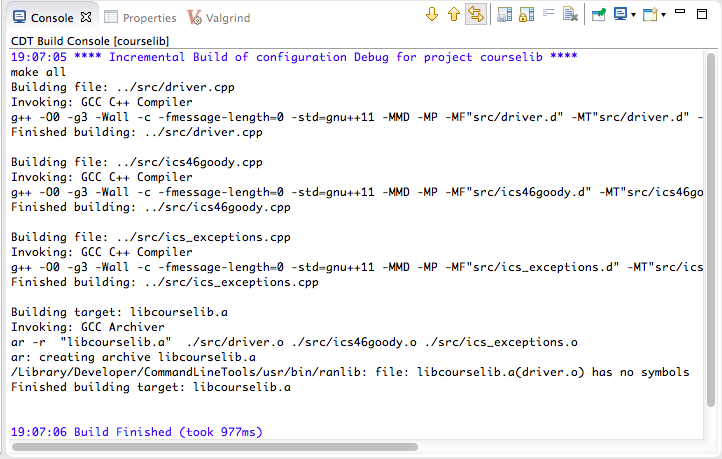
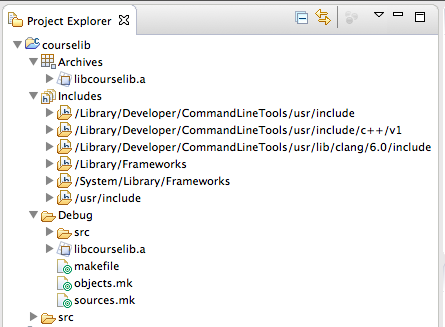
  9. If you disclose the main icons under the courselib icon in the Project Explorer tab you will see the following.

    You can also look in the Debug/src and src folders to see their .o and .hpp/.ccp files respectively. Future projects will refer to the courselib folder, to find the templated .hpp files in the top src folder, and the libcourselib.a file in the Debug folder. Later in the quarter you will be asked to study the code in the .hpp/.cpp files here for your programming assignments. If/when you are done looking now, elide all these icons leaving just the courselib icon.

In the future, you will likely be asked to download new or improved/corrected .hpp/.cpp files, move them into the library, build a new libcourselib.dylib file, and use that file in future projects.


Courselib Use: Creating a Project that Uses the Courselib

  1. Select File | New | C++ Project (as shown in step 3 above) to create a new project: either from an empty one or one from a downloaded/unzipped folder. In this example create an empty one.

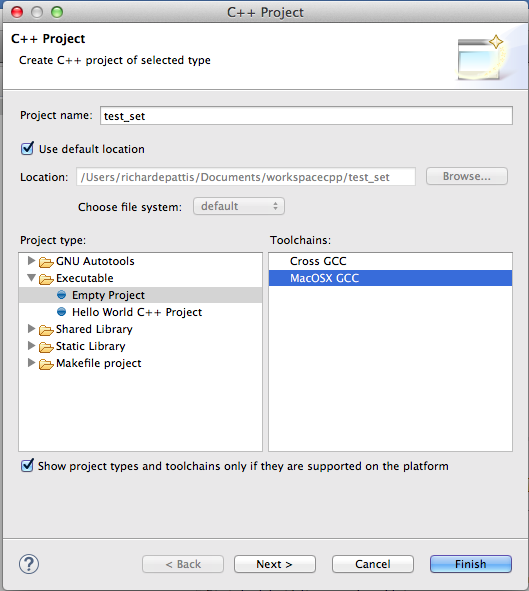
  2. Create a new C++Executable project in the C++ Project popup window.

  3. Right-click the test_set icon in the Project Explorer tab (as shown in step 5 above).

  4. Select Properties (as shown in step 6 above).

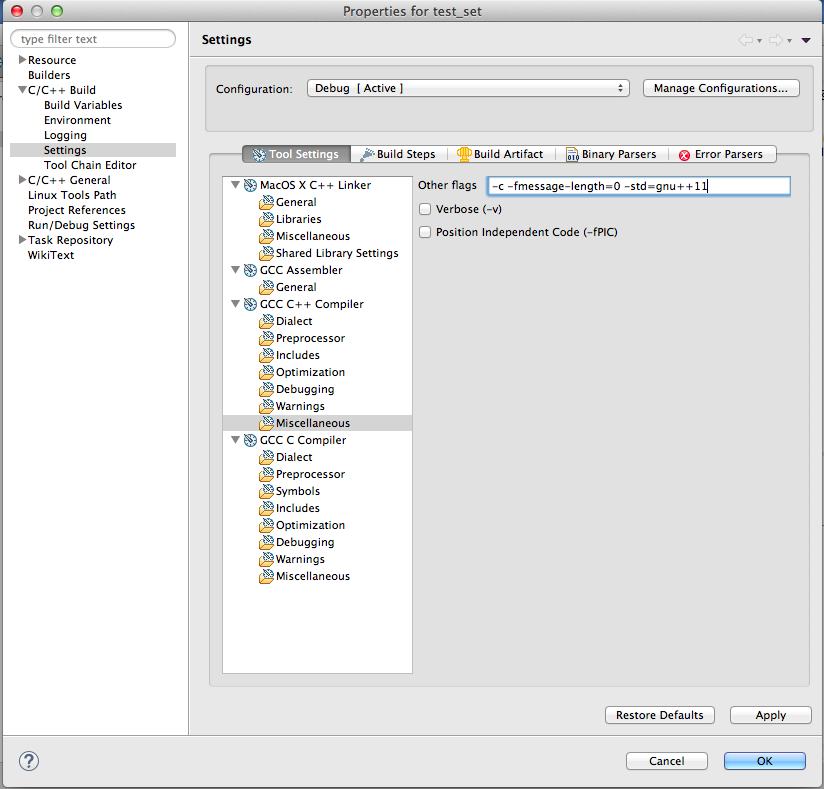
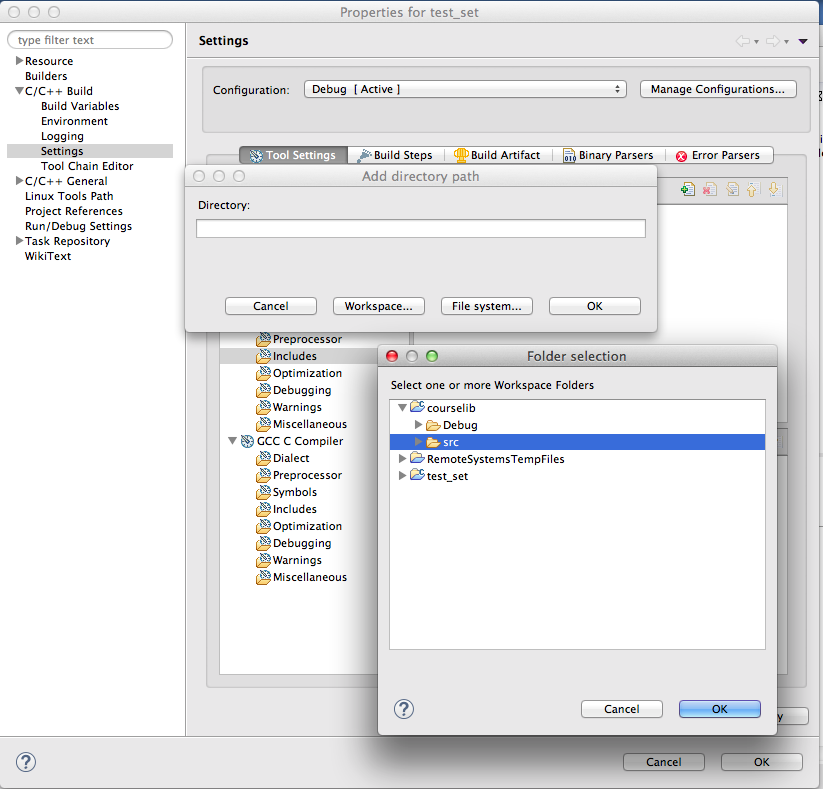
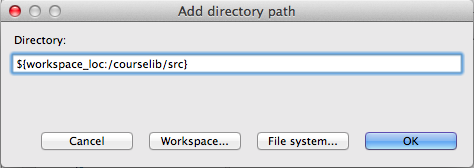
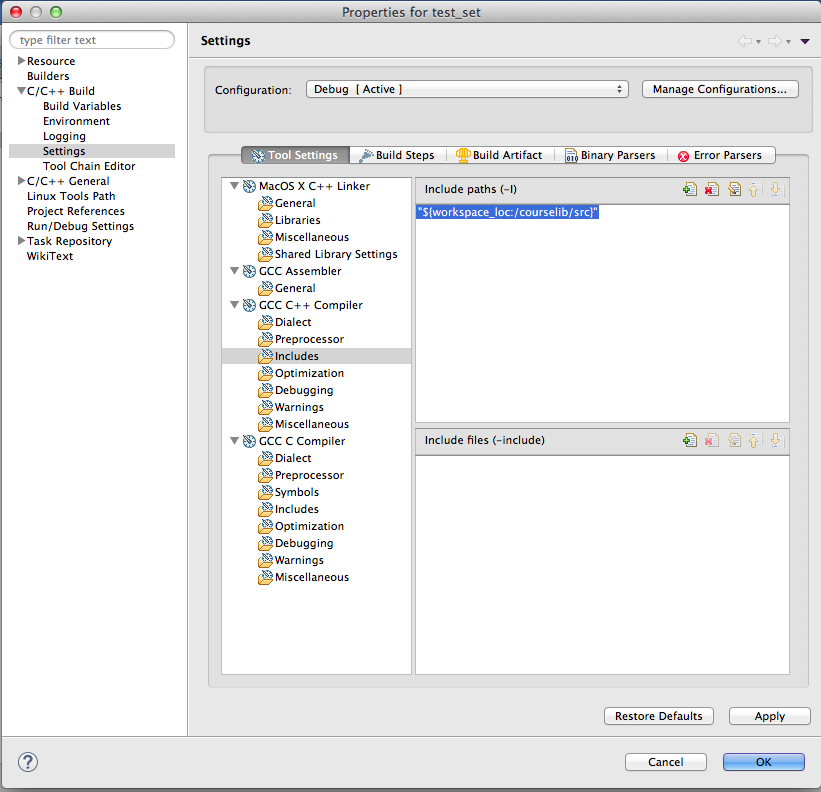
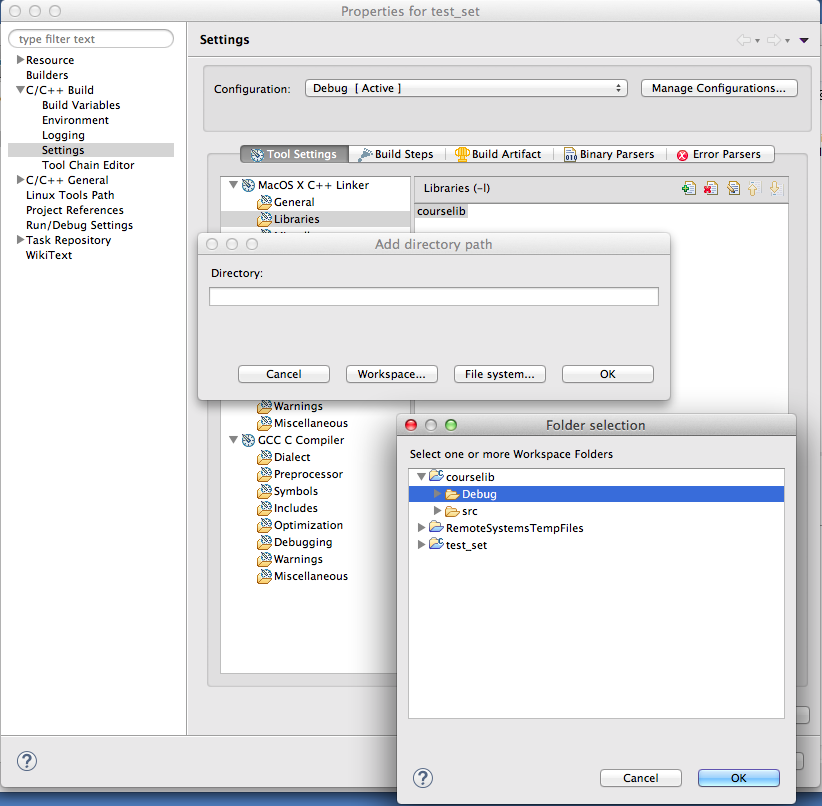
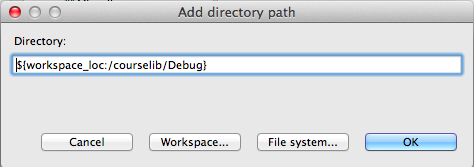
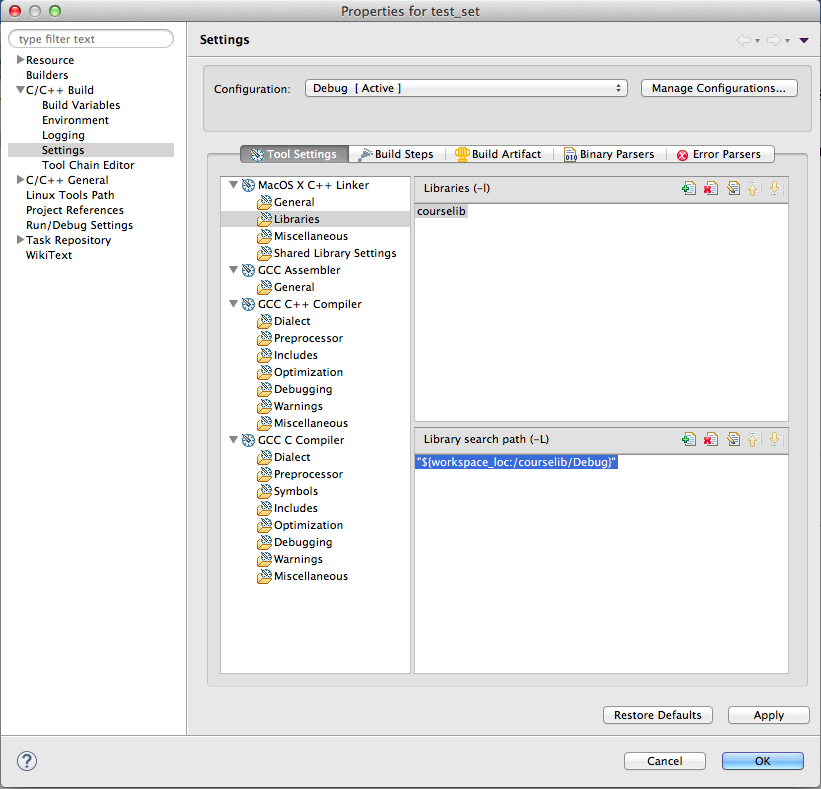
  5. In the Properties for test_set popup window

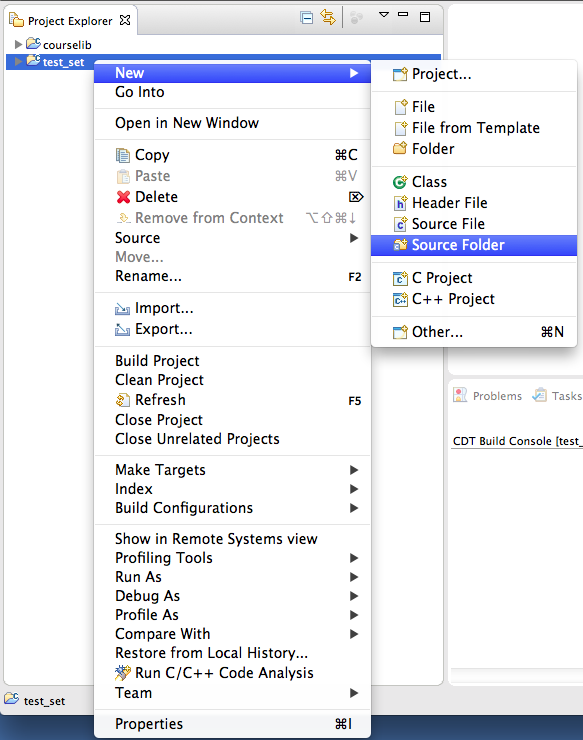
  6. Right-click the test_set icon in the Project Explorer tab and select New | Source Folder which appears as as follows.

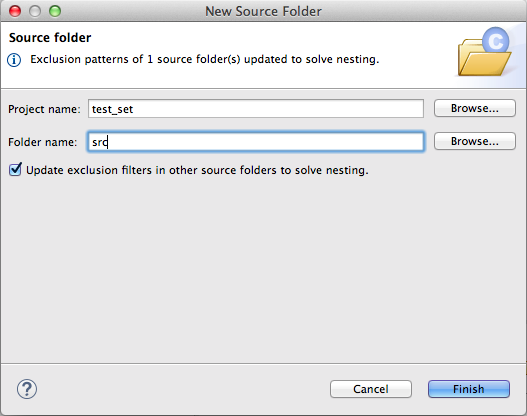
  7. In the Folder name: textbox of the New Source Folder popup window, type src which appears as follows.

    Click Finish

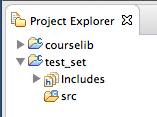
  8. Disclose the test_set icon in the Project Explorer, which appears as follows.

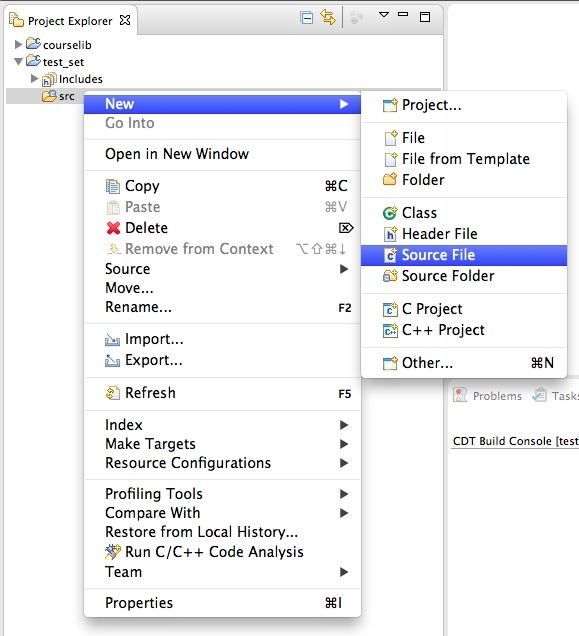
  9. Right-click the src icon in the test_set icon in the Project Explorer tab and select New | Source File which appears as as follows.

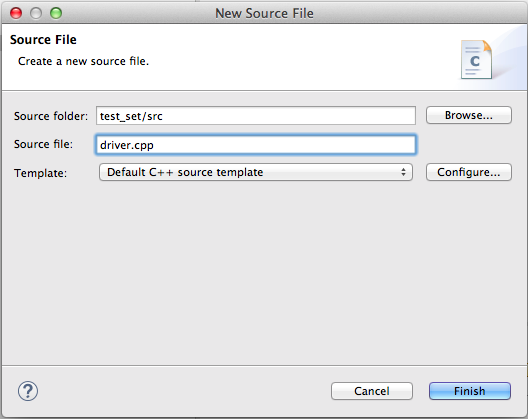
  10. In the Source File: textbox of the New Source File popup window, type driver.cpp which appears as follows.

    Click Finish.

  11. Disclose the the comment in the driver.cpp editor tab and copy/paste the following code starting on line 9.
    #include "driver_set.hpp"
    
    int main() {
      ics::DriverSet d;
      return 0;
    }
    Right click in the editor window and Save this file. The driver.cpp editor tab appears as follows

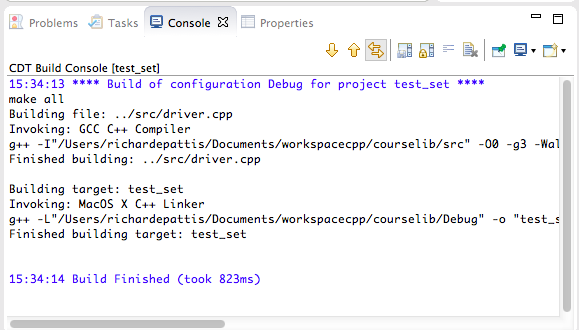
  12. Either click the Hammer icon or right-click in the test_set icon in the Project Explorer tab and select Build Project. The Console window should show the following.
  13. Right-click in the driver.cpp editor tab and select Run As | 1 Local C/C++ Application illustrated below. You can run this application in the future by clicking the Run icon .

    The program should begin running and the Console window should show the following.

    You can enter commands to test the sets (a topic we will cover soon).

    You can also either click the Debug icon or right-click in the driver.cpp editor tab and select select select Debug As | 1 Local C/C++ Application to run this program under the Eclipse debugger.
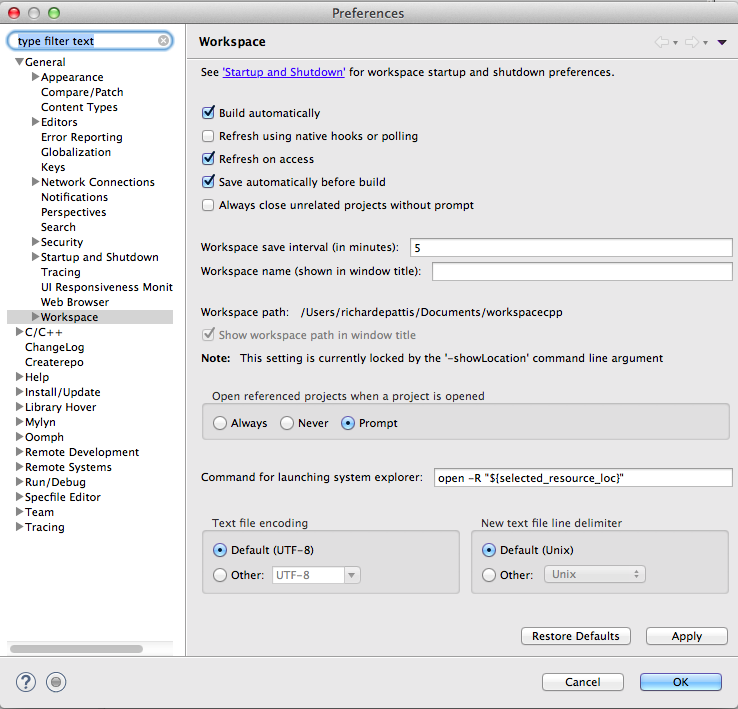
  14. To simplify the edit/build-recompile/debug loop, perform the following operation: after completing it, clicking Build or Run will automatically save the contents of any edited file before the program is rebuilt and run. On your home machine you will never have to peform this step again; in the lab must peform it every time that you log on.
Practice all these steps a few times so that you are familiar with creating new projects that use the course library.