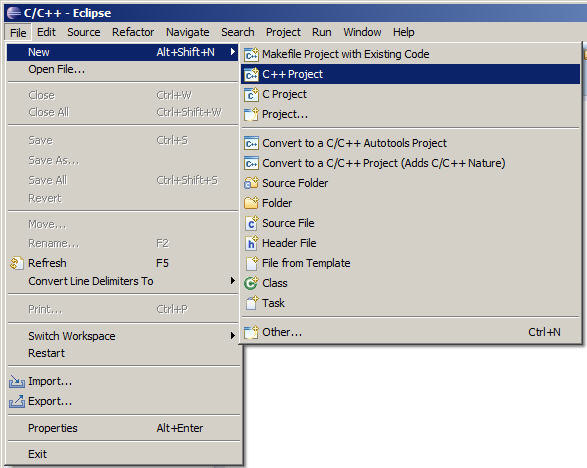
- Project Name is courselib. There will be a warning at the top: "Directory with specified name already exists".
- Specify Project type: by disclosing Static Library and selecting Empty Project.
- Specify Toolchains: by selecting MinGW GCC
- The C++ Project popup window should appear as follows.
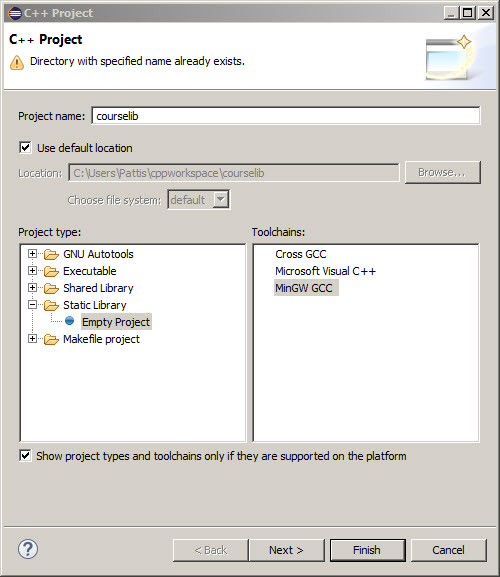
- Click Finish.

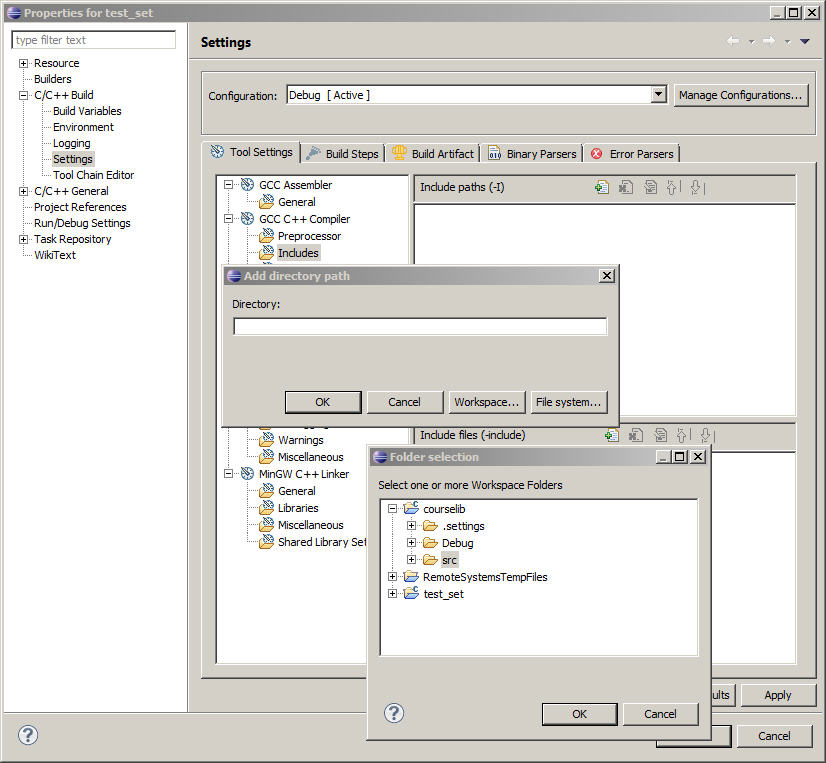
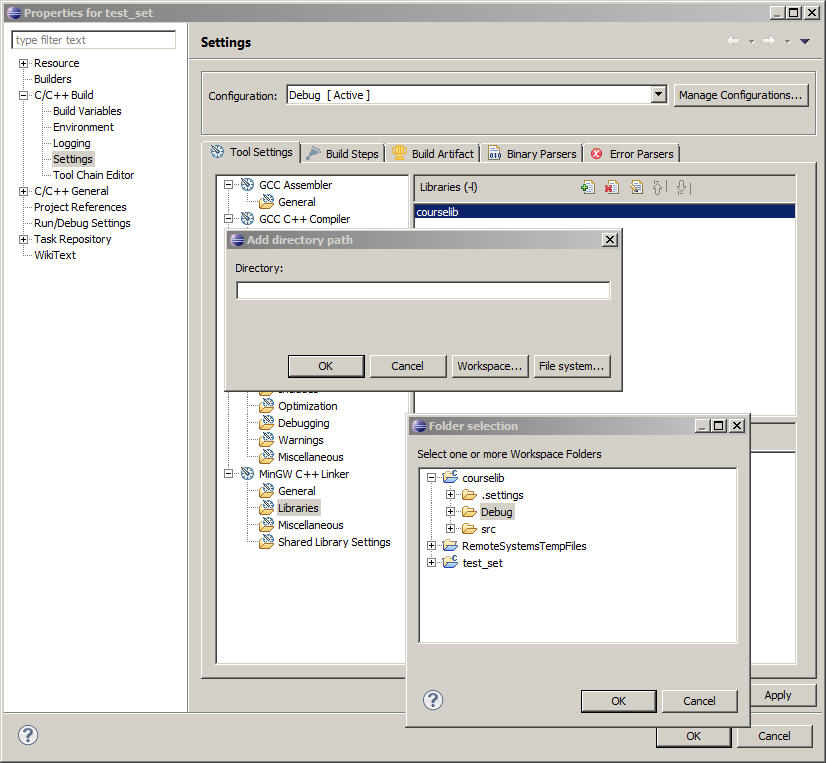
- Under type filter text, disclose C/C++ Build and Select Settings.
- Under the Tool Settings tab, under GCC C++ Compiler select Miscellaneous.
- In the Other flags textbox, type -std=gnu++11 at the end.
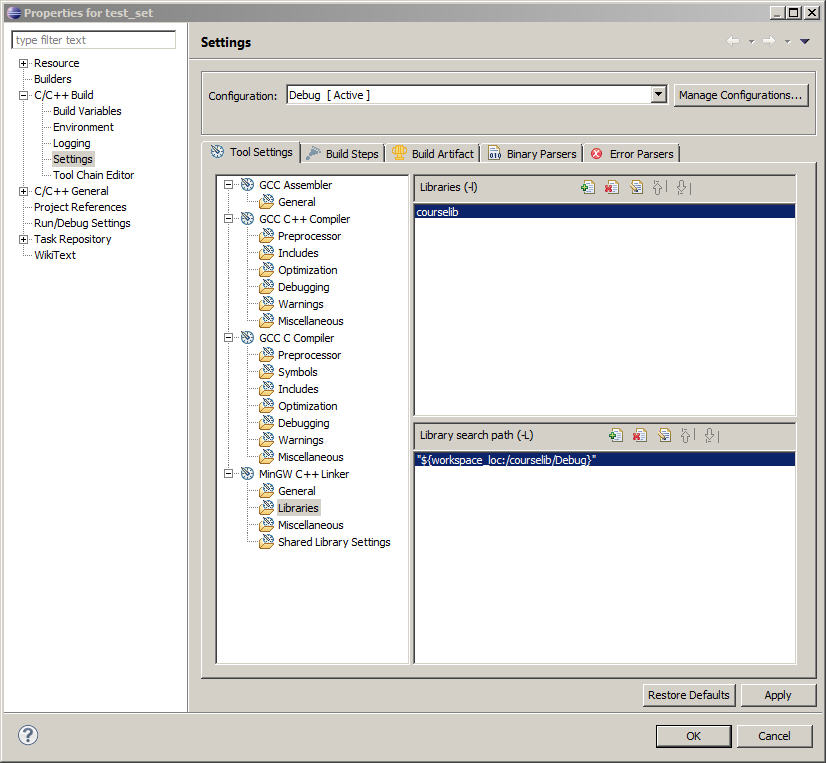
- The Properties for courselib popup window should appear as shown
below.

- Click OK.
 or
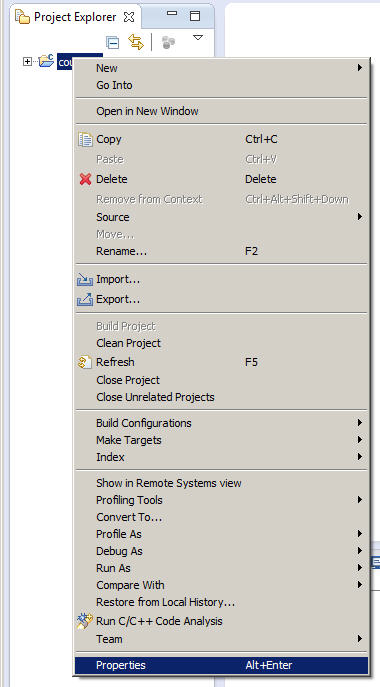
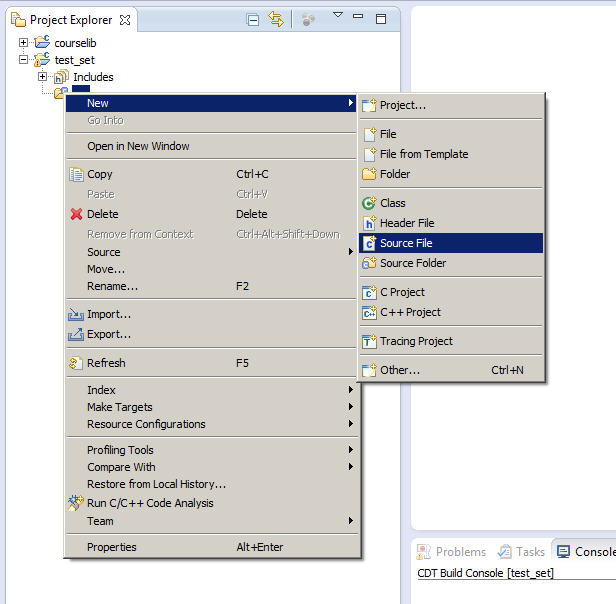
right-click the courselib icon in the Project Explorer tab
and select Build Project.
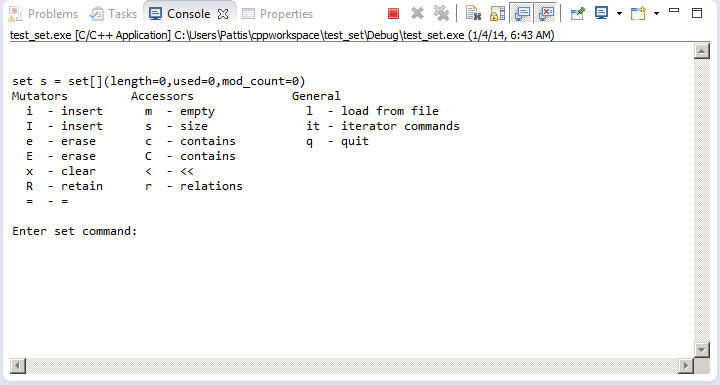
The Console window should show the following.
or
right-click the courselib icon in the Project Explorer tab
and select Build Project.
The Console window should show the following.


You can also look in the Debug/src and src folders to see their .o and .hpp/.ccp files respectively. Future projects will refer to the courselib folder, to find the templated .hpp files in the top src folder, and the libcourselib.a file in the Debug folder. Later in the quarter you will be asked to study the code in the .hpp/.cpp files here for your programming assignments. If/when you are done looking now, elide all these icons leaving just the courselib icon.


 .
.


 and copy/paste the following code starting
on line 9.
and copy/paste the following code starting
on line 9.


 .
.

 or right-click in the driver.cpp
editor tab and select select
select Debug As | 1 Local C/C++ Application to run this program
under the Eclipse debugger.
or right-click in the driver.cpp
editor tab and select select
select Debug As | 1 Local C/C++ Application to run this program
under the Eclipse debugger.

