Okay, I have a solution... Now what?
There are a few principal tasks that you'll engage in as you write your programs. Refer to the following screenshot as I continue with the tutorial:
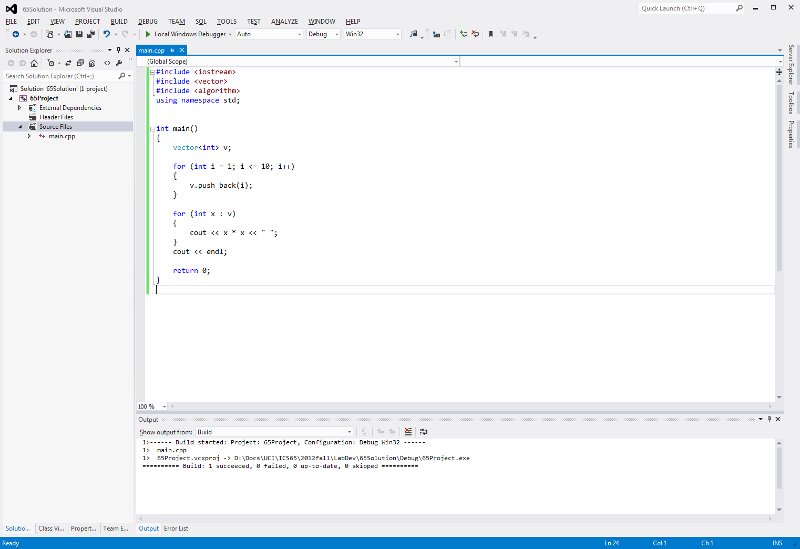
(Your Visual Studio window may be organized somewhat differently, as I've manipulated various settings over time to change the layout to my liking. Still, you should see the window divided into the sections you see above, even if they're arranged differently. Also, note that there has been a fair amount of controversy in the Windows development community about the colors and styles in the Visual Studio 2012 user interface; if you think this is not the prettiest window you've ever seen, I agree, though there are themes and other settings that you can tweak if you'd prefer a different look and feel.)
Along the left side of the window is the Solution Explorer, which, for our purposes, is a list of all of the source and header files in your program. The largest portion of the window is devoted to viewing and editing your code, providing a fairly straightforward and typical code editor. Along the bottom of the window is the Output area, which will show you the output generated by compiling your program or performing a search.
First and foremost, you'll need to add new source and header files to your program. Fear not; this is easy to do. Right-click on the name of your project in the Solution Explorer, select Add on the ensuing menu, then select New Item... on the next menu. You'll then be prompted with a dialog box that may overwhelm you at first. Don't let it! Select Code on the "Categories" list along the left, then select "C++ File (.cpp)" or "Header File (.h)" in the Templates section, then type a name into the Name field. It's that simple! From there, you can write code into the file, and Visual Studio will add it to the list of things to be compiled.
When you want to compile your program, go to the Build menu and select Build Solution (or press F7 as a shortcut). The output of the compilation process should appear in the Output area of the window. If there are errors, they'll be displayed to you after compilation is complete.
If your program compiles with no errors, it's time to run it. You can run it with or without debugging. To execute your program in debug mode, select Start from the Debug menu or press F5. To execute your program without debugging, select Start Without Debugging from the Debug menu or press Ctrl+F5. A word of advice: When you run your program with debugging, its console window disappears immediately after the program ends, without allowing you to view its output. When you run without debugging, a Press any key to continue prompt is displayed in the console window when your program ends. So, unless you really need the debugger, running your program without debugging will probably be easier for you to use.
At some point in your development, you may decide that you don't want a source or header file anymore. You can remove it from your solution by simply right-clicking it in the Solution Explorer, then selecting Remove on the ensuing menu. It should be noted that this doesn't remove the file from your hard drive; it only removes it from the solution. You'll probably also want to delete the file, so that you don't accidentally submit it.
Feel free to explore Visual Studio more on your own. Don't let yourself get too bogged down in its various features; for now, it's probably best to stick to the simple stuff and concentrate your energies on your C++ programs. Enjoy!