 Make_Kymograph plugin
Download
[here]
Note: Click on any image to view the full-sized version.
Installation
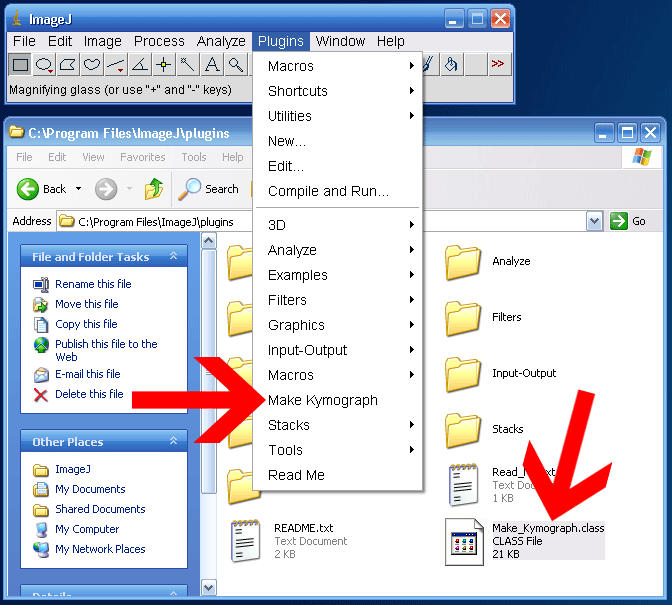
- Close ImageJ
- Copy Make_Kymograph.class into ImageJ’s plugin folder. On Windows, this is most likely C:\Program Files\ImageJ\plugins.
- Now, the next time you start ImageJ, Make Kymograph should be in the Plugins menu.
 click for full size
Using the plug-in
- Start ImageJ and open the image stack you want to run the plug-in on (File -> Open...).
- Make sure that the window containing your image stack is the active window.
- Go into the Plugins menu and select Make Kymograph.
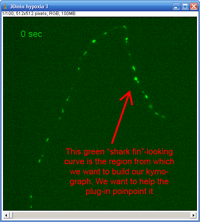
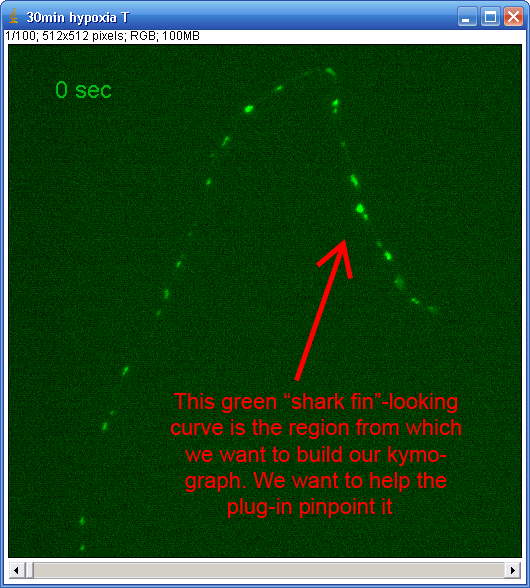
- The thresholder window will pop up. This is the tricky part. We want to help the plug-in locate the region you want the kymograph built from. For example:
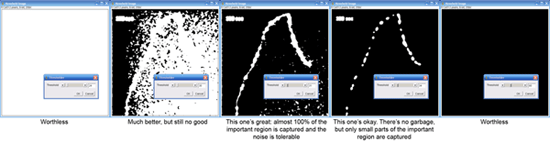
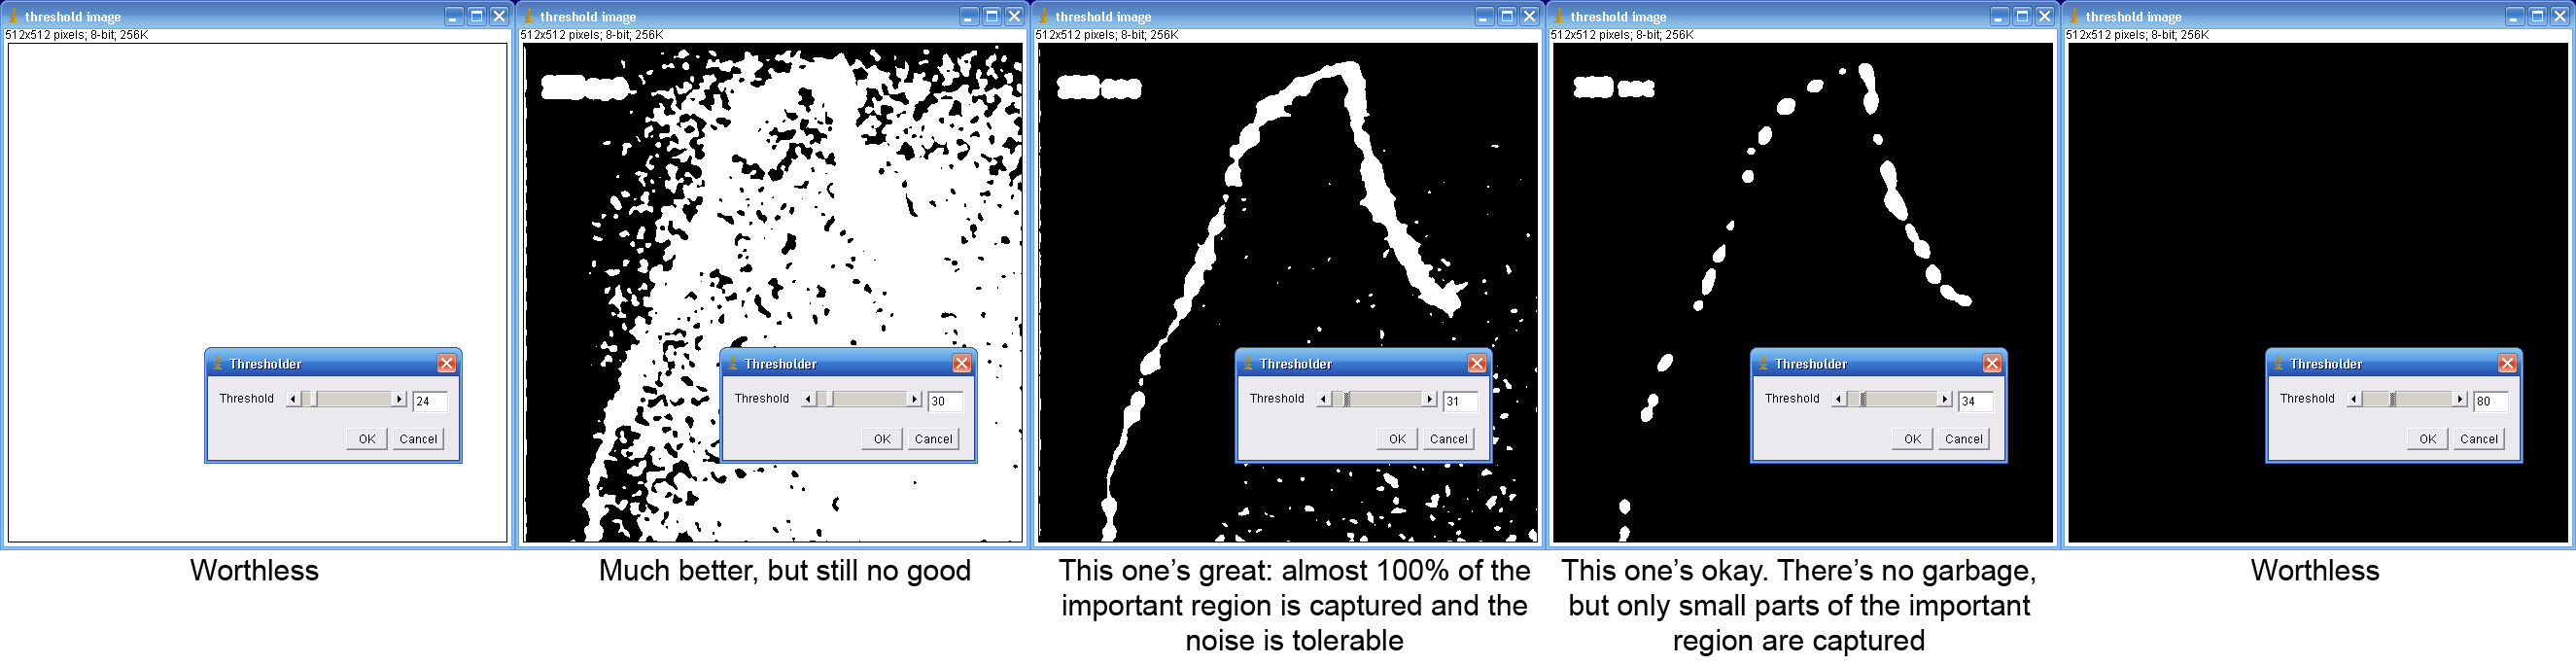
Your goal here is to use the scrollbar to choose a threshold image which includes as much of that important region as possible while not letting in too much noise/garbage. For example:
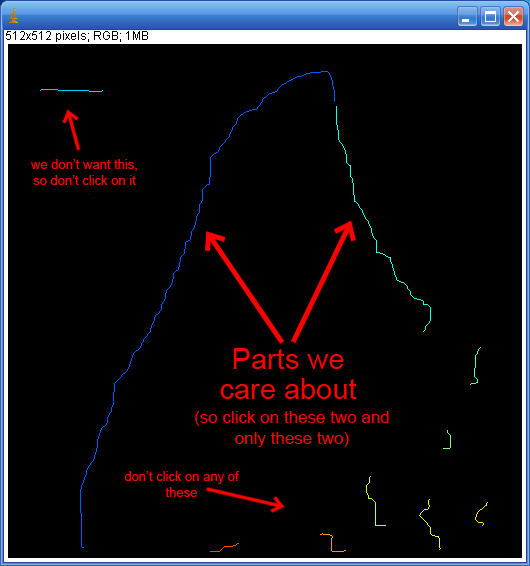
This is an important step. If later on you're not satisfied with your results, by all means restart the program and try it again with an new threshold. - Next the plug-in takes your thresholded image from the last step and skeletonizes it. The skeleton is (purposely) broken into fragments. Your goal here is to select exactly those fragments that correspond to the part of the image you want to build the kymograph out of. For example:
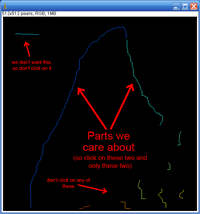
Do this as follows:- In any order, click the fragments you need. Each time the plug-in registers your click, it will tell you so by displaying a little pop-up window.
- Never click the same fragment more than once.
- IMPORTANT: To let the plug-in know you're done, you must click the last fragment in a special way. Follow these instructions carefully: (1) Hold the spacebar down, (2) while holding the spacebar down, click the last fragment, (3) release the spacebar.
- You're done! Now a bunch of windows pop up. All that's left is to understand them. Here's what they're for:
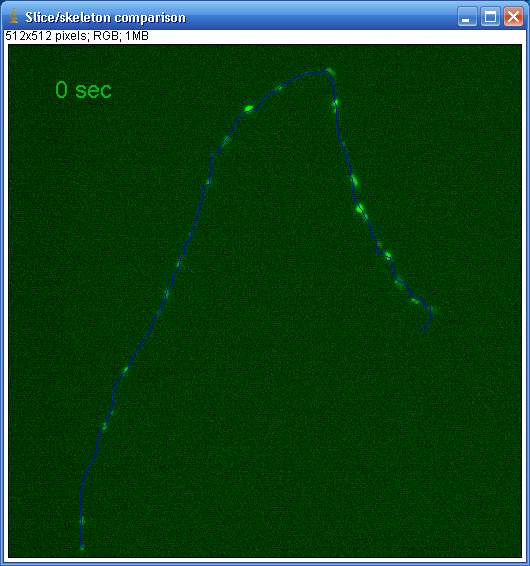
- Slice/skeleton comparison: This window is for verifying that the plug-in localized the special region correctly. It draws a blue line to show you the exact pixel locations it chose. For example, in the following image we can see that in this case it did a good job:

- The finished kymograph. Example:

- Animation window: This one's a fun special feature. Hover your mouse arrow over the kymograph and a new window will immediately pop up. This new window (titled MouseMotionListener window) has a crosshair on it which reacts to the location of your mouse arrow whenever it's positioned somewhere on the kymograph. It works as follows:
- Moving the mouse arrow vertically scrolls "through time"; i.e., move the mouse arrow towards the bottom row of the kymograph and the animation window will scroll through the stack towards the last slice, and vice versa.
- Moving the mouse arrow horizontally moves the crosshair along the line of pixels the plug-in built the kymograph from.
- Slice/skeleton comparison: This window is for verifying that the plug-in localized the special region correctly. It draws a blue line to show you the exact pixel locations it chose. For example, in the following image we can see that in this case it did a good job:

- Sometimes the kymograph is too dim to see well. One way to remedy this is to use one of ImageJ's contrast adjustment features. Instructions: Process menu -> Enhance Contrast -> Check the "Equalize Histogram" checkbox -> Click "OK".